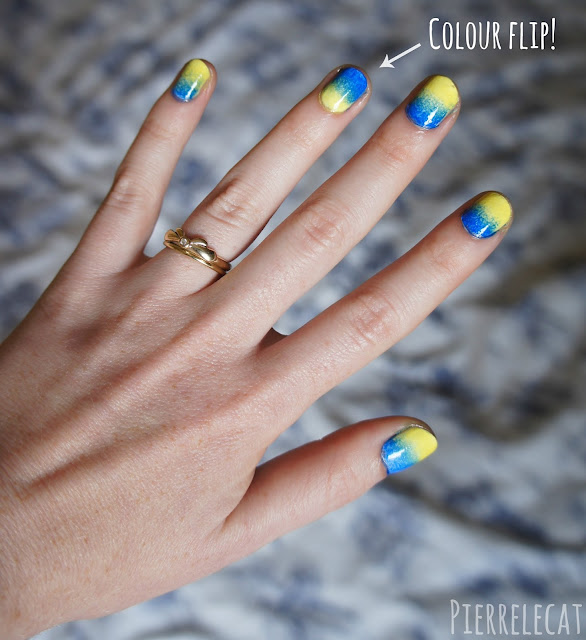
This week my nail art novice adventure takes me into the world of dip-dye. Well, a dip dye attempt.
Barry M - Gelly Hi Shine (Blue Grape)
Rimmel - Lasting Finish (Cute as a Kitten Heel)
Maybelline top coat
Andrea Fulerton Nail Boutique (Quick Dry)
To celebrate the summer holidays (for those lucky enough to have them..) and after we finally got round to booking our honeymoon (only two years after the wedding. What can I say? We don't like to be rushed..) I thought what's better than a seaside inspired colour scheme?
Sounds ambitious, right?
Turns out this effect is surprisingly simple..
Ok, so I've got to admit I've tried this effect before.. Unfortunately the first time round I used colours that were too similar and the overall effect was a little lost. One positive thing that came out of using similar shades was I was able to make a few mistakes without it being too noticeable.That'd be my top tip for other nail art novices.. Start small.
I started with an undercoat of white to make the colours pop on top.
As for the technique? It's all about the make up sponge.. And a whole lot of nail varnish remover!
You can pick up a pack of simple make up sponges from somewhere like Home Bargains. I spotted a mega pack for around the £1.99 mark. Bargain! Grab hold of your make up wedge (which is the shape I've been using) and slap on your two colours. Make sure they over lap slightly and that the area you've painted on the wedge is wide enough to cover your biggest nail. Next press it directly onto the nail.
Expect plenty of nail varnish to end up around your nail. I've found it best to paint one nail, then use nail varnish remover to take the excess off as I go. This means there's less time for the varnish to dry on my skin and it's a lot easier remove.
Then simply repeat.. (You can flip the sponge over to get a reverse effect like I did too) I added a top coat, a fast dry varnish on top of that and I was good to go.
Again this is an easy effect but it can be pretty time consuming.. But if you get really good I've got a feeling this could be used as a base for a bit of seaside related detailing. I'm thinking of a bucket and spade? But I'll leave that to the professionals.. For now!
What do you think nail art novices? Have I convinced you to attempt this dip dye/ ombre nail art effect?


It's very easy to practice.Lovely nail art ,the unique way of body painting.
ReplyDeleteNice! I am way too impatient to try something like this. Plus, I do tend to pick my nail varnish off the second it's completely dry. DRIVES THE BOY MENTAL (especially when he finds all the bits in the car from when I've been drying).
ReplyDeleteMY NAME IS AMY AND I AM A NAIL PICKER.
How clever! I need to try this!
ReplyDeleteEmma x
http://beautyandrags.blogspot.co.uk/
Ooooh love it, never tried this before... looks fab in bright colours. x
ReplyDeleteThese look great. The colours really stand out. X
ReplyDeletewow! really nice :)
ReplyDeletei love your blog. x
Chris
http://lapetitetasse.blogspot.it/
I love this tutorial!
ReplyDeleteElise Dopson x
This looks great! Check out the ombre nails I did on my sister http://gingerbreadsmiles.blogspot.co.uk/2013/07/ombre-nails.html
ReplyDeleteDanni :)
x